Summary
A previous tutorial covered assembling your own toolbar. This will become even more interesting if you add your own toolbar tools to it. This tutorial quickly walks you through and suggests some best practices.
1. Create a Folder with Syntax and Images
 Setting Up your SPSS Toolbar Tools Like so may Speed Things Up
- The most basic toolbar tool is nothing more than an SPSS syntax file.
- You could create tools for large tasks but miniature syntax files may be more suitable as toolbar tools. An exception are Python Scripts for typical output modifications.
- For example, the single line
SET MPR OFF PRI OFF.or its counterpartSET MPR ON PRI ON.are nice to have available with a single mouse click. - On the toolbar, one clicks on icons in order to run tools. Bitmap (.bmp) images of 32 by 32 pixels are recommended as icons.
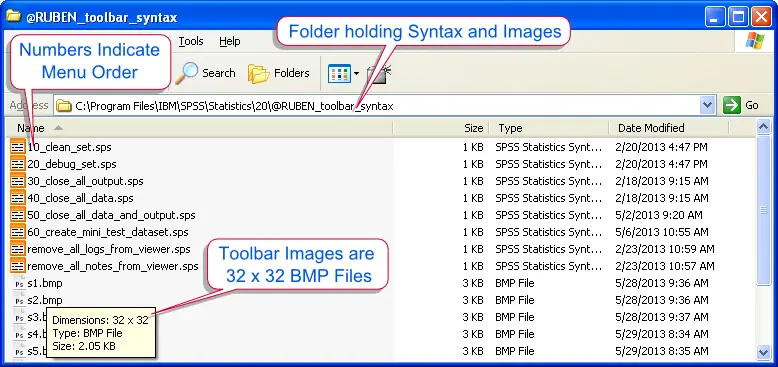
- Syntax and image files may be located anywhere but putting them into a single folder is convenient. A handy location for this folder is the SPSS installation folder (for example
C:\Program Files\IBM\SPSS\Statistics\20). - Numbering the tools and icons may speed up the process. The screenshot below illustrates a nicely set up folder for custom toolbar tools.
2. Creating Toolbar Tools

- Click

 . Select the toolbar to which you'd like to add your own tools and click .
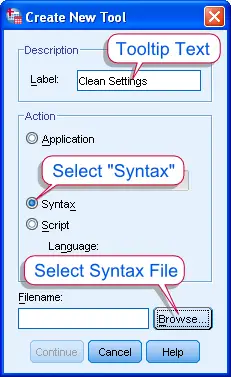
 - Now click . Next, choose a label. (It may include spaces and will be used to identify the tool. It will also used as the tooltip text for this tool.)
- Select (under ), browse to the syntax file and click . If you'd like to create more than one tool, it is recommended you first create all tools before you take any next steps.
3. Editing the Toolbar
 Drag and Drop Newly Created Tools onto the Toolbar
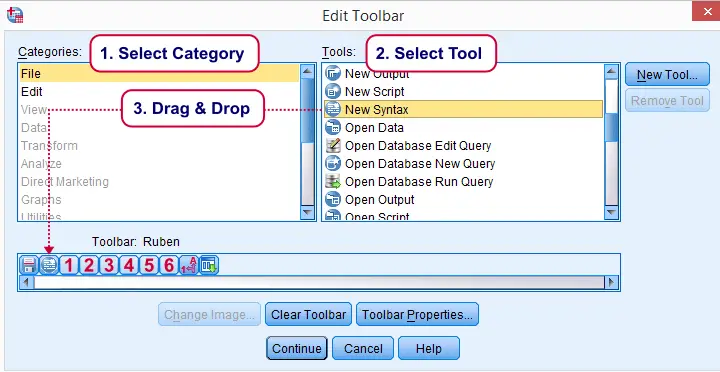
- After creating all toolbar tools as desired, you can drag-and-drop them onto the toolbar. Note that the tools you create yourself are automatically categorized under (lowermost category).
- As a last step, it's recommended to assign a unique image to each of the new tools. This is done by selecting the default icon with a left mouse click. Note the tiny black border -though hardly visible- on the right and bottom side of the image.
- Next, a new image can be chosen by . After changing all images, click
 and you're done.
 SPSS TUTORIALS
THIS TUTORIAL HAS 1 COMMENT:
By Linda Martell on July 15th, 2015
Good