We held a reaction time experiment in which people had to resolve 20 puzzles as fast as possible. The 20 answers and reactions times are in an SPSS data file which we named trials.sav. Part of if is shown below.

In first instance, we'd just like to inspect the histograms of our reaction time variables. The easiest way is running FREQUENCIES as shown below but specifying the right variable names is cumbersome even for this very tiny data file.
frequencies Trial_1_Reaction_Time_Milliseconds Trial_2_Reaction_Time_Milliseconds Trial_3_Reaction_Time_Milliseconds /*and so on through 20.
/format notable
/histogram.
If our reaction times were adjacent, we could address the entire block with the TO keyword. We'll therefore reorder our variables with ADD FILES as shown in SPSS - Reorder Variables with Syntax. The easiest way to get the job done is ADD FILES FILE */KEEP id to agegroup [reaction time variables here] ALL. ALL refers to all variables in our data that we haven't specified yet -in this case all answer variables. This command still requires spelling out all reaction time variables unless we have Python do that for us. Let's first just look up all variable names and proceed from there.
1. Retrieve Variable Names by Index
The spss module allows us to retrieve variable names by index. Now, we've 43 variables in our data but Python starts counting from 0. So our first and last variables should be indexed 0 and 42 by Python. Let's see if that's right by running the syntax below.
begin program python3.
import spss
print(spss.GetVariableName(0))
print(spss.GetVariableName(42))
end program.
2. Retrieve All Variable Indices
So if we can retrieve the first and last variable names by their Python indices -0 and 42- then we can retrieve all of them if we have all indices. A standard way for doing just that is using range.
Technically, range is an iterable object which means that we can loop over it. The syntax below shows how that works.
begin program python3.
for ind in range(10):
print(ind)
end program.
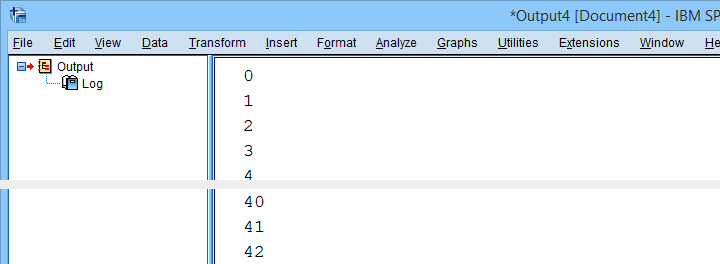
*Print all variable indices.
begin program python3.
import spss
for ind in range(spss.GetVariableCount()):
print(ind)
end program.
Result
3. Retrieve All Variable Names
We'll now run a very simple Python for loop over our variable indices. In each iteration, we'll retrieve one variable name, resulting in the names of all variables in our data. We'll filter out our target variables in the next step.
begin program python3.
import spss
for ind in range(spss.GetVariableCount()):
print(spss.GetVariableName(ind))
end program.
4. Filter Variable Names
Before we'll create and run the required syntax, we still need to filter out only those variables having “Time” in their variable names. We'll use a very simple Python if statement for doing so. The syntax below retrieves exactly our target variables.
begin program python3.
import spss
for ind in range(spss.GetVariableCount()):
varNam = spss.GetVariableName(ind)
if 'Time' in varNam:
print(varNam)
end program.
5. Create Python String Holding Target Variables
We'd like to create some SPSS syntax containing the variables we selected in the previous syntax. We'll first pass the names into a Python string we'll call timeVars. We first create it as an empty string and then concatenate each variable name and a space to it.
begin program python3.
import spss
timeVars = ''
for ind in range(spss.GetVariableCount()):
varNam = spss.GetVariableName(ind)
if 'Time' in varNam:
timeVars += varNam + ' '
print(timeVars)
end program.
Minor note: editing Python strings is considered bad practice because they're immutable. Our reason for doing so anyway is that it keeps things simple. It gets the job done just fine unless we're processing a truly massive amount of code -which we basically never do in SPSS.
6. Create Required SPSS Syntax
We're almost there. We'll now create our basic ADD FILES command as a Python string. In the syntax below, %s is a placeholder that we'll replace with our time variable names. For more details on this technique, please consult SPSS Python Text Replacement Tutorial.
begin program python3.
import spss
timeVars = ''
for ind in range(spss.GetVariableCount()):
varNam = spss.GetVariableName(ind)
if 'Time' in varNam:
timeVars += varNam + ' '
spssSyntax = "ADD FILES FILE */KEEP id to agegroup %s ALL."%timeVars
print(spssSyntax)
end program.
7. Create and Run Desired Syntax
Let's take a close look at the syntax we just created. Is it exactly what we need? Sure? Then we'll comment out the print command and run our syntax with spss.Submit instead.
begin program python3.
import spss
timeVars = ''
for ind in range(spss.GetVariableCount()):
varNam = spss.GetVariableName(ind)
if 'Time' in varNam:
timeVars += varNam + ' '
spssSyntax = "ADD FILES FILE */KEEP id to agegroup %s ALL."%timeVars
#print spssSyntax
spss.Submit(spssSyntax)
end program.
execute.
8. Run Histograms
Now that we nicely sorted our variables, running the desired histograms is easily done with the TO keyword as shown below.
frequencies Trial_1_Reaction_Time_Milliseconds to Trial_20_Reaction_Time_Milliseconds
/format notable
/histogram.
Although we got our first job done, we're rather dissatisfied with the crazy long variable names. In our humble opinion, variable names should be short and simple. More elaborate descriptions of what variables mean should go into their variable labels.
We're going to do just that in our next lesson.
Let's move on.
THIS TUTORIAL HAS 1 COMMENT:
By A. Raweh on June 8th, 2022
This is a great code. Thanks for sharing!